
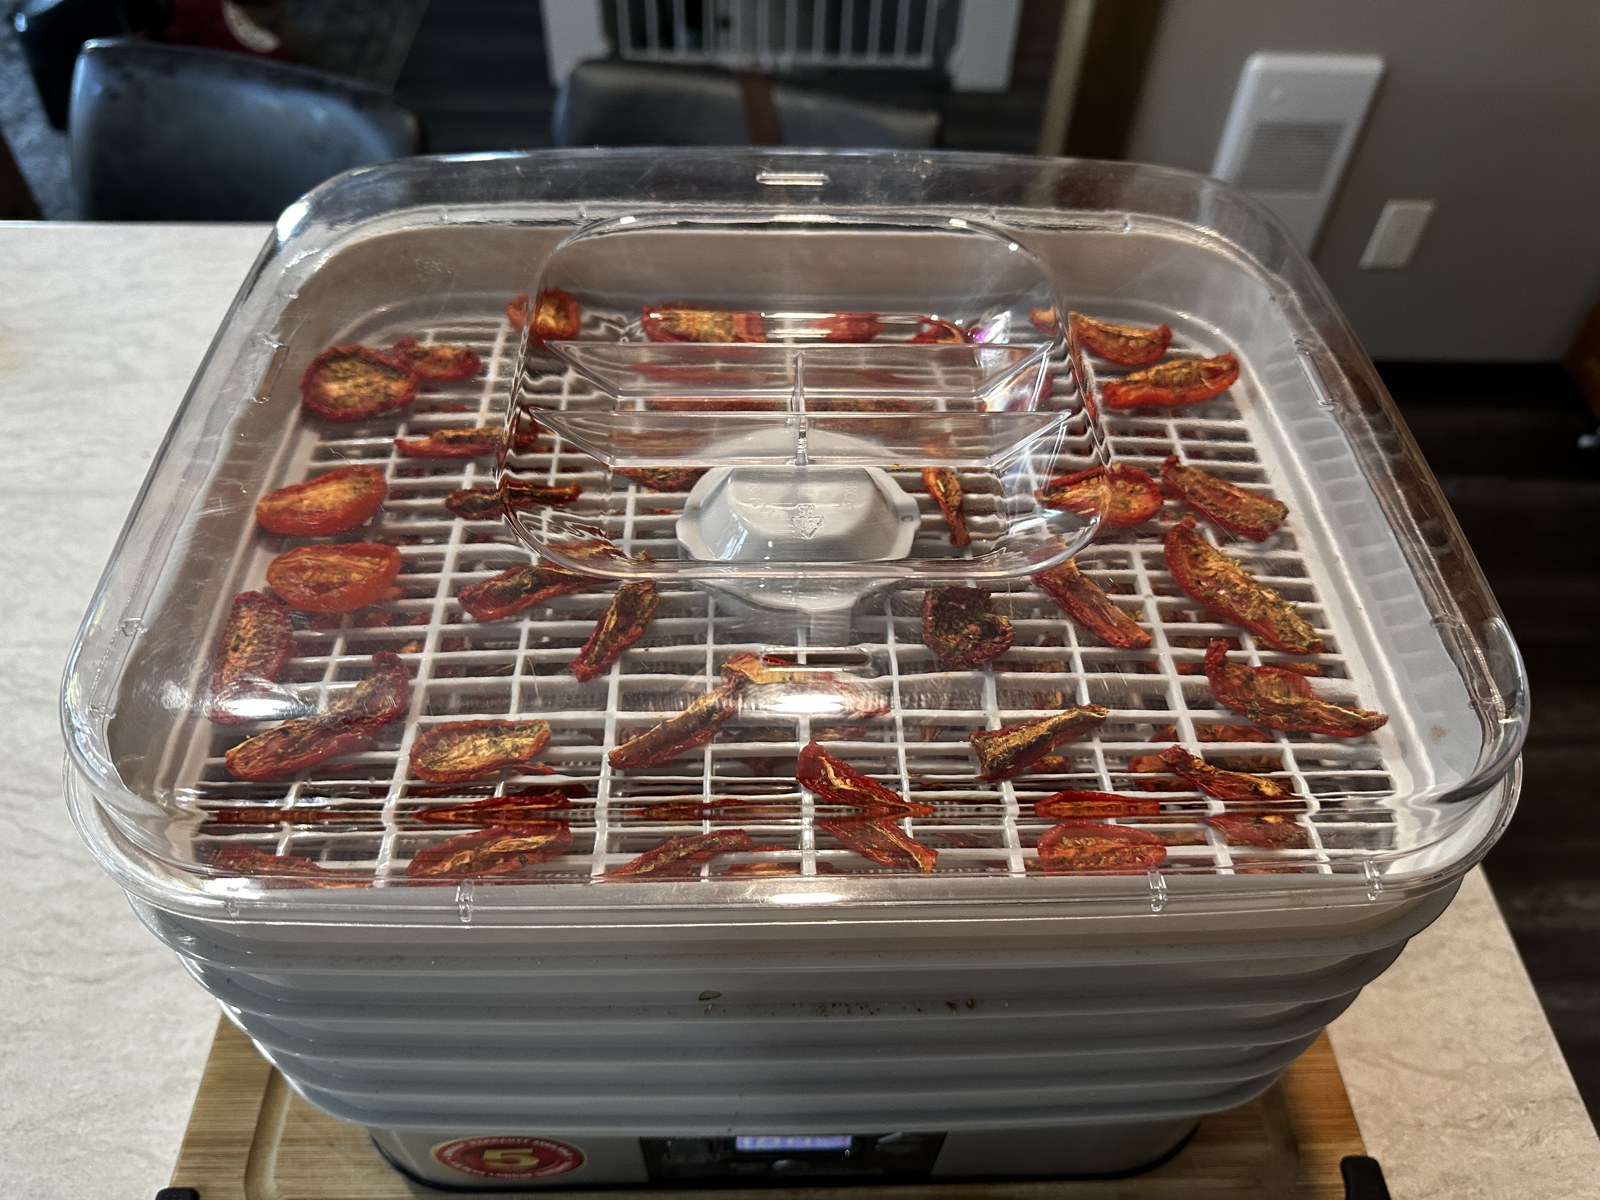
Our batch: a growing project, not a stopwatch recipe
When I checked this batch it had been drying for 15 hours and was still going. That is a progress update, not a recommended finishing time. Moisture, thickness, tray loading, airflow and your equipment all affect how long drying takes.
The steps below draw on university food-preservation guidance. I’m sharing my own ingredients and photographs alongside that guidance, rather than claiming our unfinished batch proves a particular temperature or storage life.
Choose, wash and slice
Choose sound, ripe tomatoes. Wash them under running water, remove the stem/core and discard spoiled fruit. Paste-type tomatoes are a useful choice because they are meaty, but drying is not limited to one variety.
Oregon State Extension recommends slices about ¼–⅓ inch thick, or sections no more than ¾ inch wide. Keep pieces reasonably uniform and arrange them in a single layer with space for air to circulate. Peeling is optional in its tomato guidance.
Keep the seasoning simple
Our batch uses salt, pepper, oregano and garlic powder. Use a light hand, particularly with salt: drying concentrates the flavour, and the tomatoes may later go into a seasoned dish.
If you want to know exactly what you’re adding, read the seasoning labels too. A blend may contain extra salt, sugar or other ingredients. “Tomatoes and these seasonings” describes this batch more accurately than an unverified additive-free claim.
Controlled heat and airflow
Use a food dehydrator and its instructions together with tested drying guidance. The National Center for Home Food Preservation describes dehydrators designed to dry food at about 140°F (60°C). Don’t treat a lower temperature as automatically healthier, safer or more even.
Check pieces as drying progresses and remove those that have finished. Follow your equipment’s instructions for tray rotation if needed. Judge the result as well as the elapsed time.
No dehydrator? Check the equipment you already own
A suitable oven can be used for drying when it maintains controlled low heat and allows moisture to escape. Air fryers and toaster ovens are options only when the particular model supports appropriate dehydration operation; a normal high-heat cooking setting is not interchangeable with drying.
Use an oven thermometer and the appliance instructions. Don’t prop a door open unless the manufacturer permits it. A countertop fan alone does not provide the controlled heat needed for the method we recommend here. Compare electricity and batch capacity before assuming one appliance is cheaper.
Finish drying before you put it away
Oregon State’s tomato guidance calls for drying until leathery and crisp; its oil-storage guidance requires fully dried pieces without residual moisture. Crisp, brittle pieces are especially useful for grinding. Let pieces cool before assessing them and check the thickest pieces rather than judging only the surface.
For shelf storage, follow the dryness endpoint of the tested method you use. If you are unsure whether the batch is sufficiently dry, don’t seal it up and assume it is shelf-stable.
Generic dried-fruit conditioning directions are not a universal tomato step. NCHFP says crisp dried vegetables do not need fruit-style conditioning. Never use conditioning to compensate for unfinished drying.
Cool, package and check
Cool fully before packing into clean, dry, airtight containers. Warm food can cause condensation. Use small portions so the whole supply isn’t repeatedly exposed to air and moisture. Store appropriately dried tomatoes in a cool, dry, dark place and label the date.
Shelf life varies with moisture, packaging and storage temperature; we aren’t promising a fixed year of storage. Check for moisture or spoilage. Discard mouldy dried food. Vacuum sealing is packaging, not a substitute for complete drying.
Olive oil changes the storage rules
For tomatoes seasoned with garlic or herbs and then packed in oil, Oregon State’s Herbs and vegetables in oil guidance requires refrigeration and use within four days, or freezing for longer storage. That is the rule we use for this garlic-and-oregano batch—not room-temperature pantry storage.
For a simple pasta meal, keep your preserved supply dry and prepare only the portion you need. Oil adds flavour; it does not rehydrate tomatoes in the way water does. Do not use a cooking soak in water or wine as a tested method for making oil-packed tomatoes shelf-stable.
From the dehydrator to the pasta bowl
Soften a portion in hot water as needed for your recipe, drain and chop, then add it to pasta with a little olive oil. Timing depends on the pieces, so check their texture rather than relying on a guaranteed soak time. Treat softened tomatoes as perishable food.
You can also add dried pieces to a simmering soup or stew, or grind fully brittle tomatoes into powder for sauces and seasoning. A pasta follow-up will show how I use our actual finished batch, rather than presenting a meal we haven’t cooked yet.
What does it really cost?
We’ll show actual costs when we have the measurements. For this batch we haven’t yet recorded a finished dried weight or verified electricity cost, so there is no savings percentage to claim.
A fair comparison includes tomato growing or purchase costs, seasoning, energy and containers, with equipment and labour stated separately. Compare equal dried weights and similar ingredients against a dated store price. Homegrown doesn’t automatically mean free—but using more of what you grow avoids wasting the harvest.
More harvest. Less waste.
This series will connect growing, preserving and everyday meals. Herbs, squash and other seasonal crops will follow as we have real material to share, alongside composting and worm farming for suitable scraps.
Grow it. Save it. Enjoy it. Find more growing projects in the journal and useful supplies in our store.